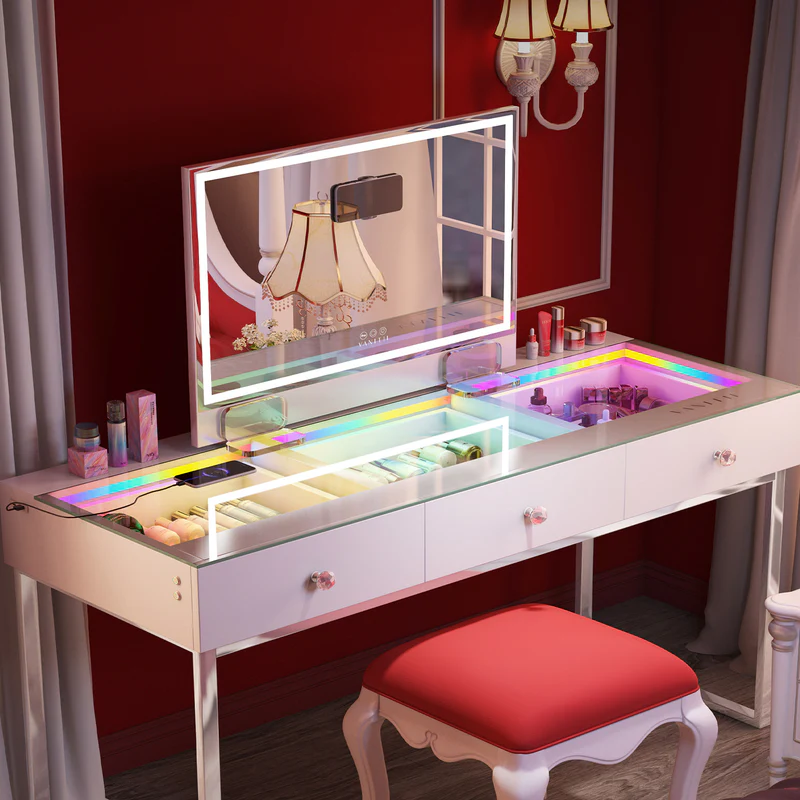
Your vanity desk is the centerpiece of your daily beauty routine. It’s where you prep your makeup, do your skincare, and start each day looking and feeling your best. But over time, dust, makeup spills, and product buildup can leave your once sparkling vanity looking dull and grimy. That’s why it’s crucial to give your desk and lighted mirror a deep clean regularly. This comprehensive guide covers every step for restoring your vanity to pristine condition - from clearing the desktop clutter to sanitizing the mirror, bulbs, and fixtures. You’ll learn how to banish stains, polish wood and metal surfaces to a brilliant shine, and organize all your makeup and accessories for maximum convenience.

Step 1: Clear the Clutter for a Fresh Start
Get Everything Off the Vanity
First thing’s first - you’ve got to clear all the stuff off your vanity. Remove every last makeup product, brush, hair accessory, piece of decor - everything. This lets you easily get into every nook and cranny without anything in the way.
Time for Some Reorganizing
With that blank canvas of a vanity, it’s the perfect time to do some reorganizing. Go through all your beauty products, tools, and trinkets.
Your Must-Haves vs. Extras
Separate out the essentials - the makeup, brushes, skincare, etc. that you use daily. Then take a look at all the extra stuff you rarely touch - old products, duplicate items, and any sentimental things.
Toss or Relocate
As you’re sorting, be honest with yourself about what to actually keep on your vanity. If it’s dried out, broken, or you know you’ll never use it again, just toss it. Any products or tools you rarely go for can be stored elsewhere to declutter. And while you're at it, this is the perfect time to take stock of your essential tools - are they still serving you well? Maybe your old eyelash curler could use an upgrade, or perhaps a set of high-quality makeup brushes would make all the difference in your routine.
Grab Cleaning Supplies
Next up, gather all the cleaning supplies you’ll need. Definitely get microfiber cloths, a soft brush for dusting, an all-purpose cleaner, and a glass cleaner. For any wood surfaces, pick up a gentle, wood-friendly cleaner too.
With your vanity completely cleared off and your cleaning arsenal ready, you’re all set to really dive in and get scrubbing! Having an organized set of products makes the whole process easier.
Step 2: Deep Clean Every Nook and Cranny
Dust Away
Start by giving your vanity desktop a thorough dusting. Use a soft-bristled brush to loosen and remove any dust or makeup particles settled in corners and edges. This prevents that debris from just smearing around when you wipe down surfaces.
For Delicate Areas
If your vanity has any intricate detailing or hard-to-reach spots, use a fresh makeup brush to carefully dust those delicate areas without scratching.
Minimize Re-settling
Work slowly and methodically to prevent kicking up dust clouds that could resettle. Consider laying down a towel or draping a cloth over your lap to catch falling particles.
Vacuum the Drawers
Next up, open every drawer, compartment or cubby and go at it with the vacuum hose attachment. This suctions up all the powder, hair, and mystery gunk that accumulates in these storage areas over time.
Wipe Down Interiors
After vacuuming, wipe down the inside of drawers and shelving with a microfiber cloth lightly dampened with your preferred cleaner. This picks up any remaining residue.Now that your drawers are sparkling clean, you're ready for the fun part - organizing everything inside!
Tackle Stains
Now it’s time to deal with any stubborn stains, spills or buildup on the desktop itself. Spray or dab on a gentle cleaning agent made for your vanity material. Avoid anything abrasive that could scratch.
Proper Drying
Once cleaned, make sure to thoroughly dry off all moisture to prevent water stains or damage. Use a fresh microfiber cloth to buff out any streaks.
Step 3: Make Your Mirror and Lights Shine Bright
Get That Mirror Sparkling
You’ll want to use a glass cleaner made specifically for mirrors to avoid streaking. Spray it directly onto the mirror, then wipe clean with a fresh microfiber cloth folded into quarters.
For Streak-Free Results
Once you’ve wiped the whole surface, go over it again with a dry microfiber cloth, buffing in tight circles. This removes any residual haze for a crystal clear, streak-free shine.
Brighten Up Those Lights
Don’t forget to also clean the light bulbs and fixtures around your mirror! Unplug or turn off the lighting first for safety.
Handle with Care
Use a clean dry cloth to gently wipe off any dust buildup on the bulbs and lamp shades or housings. Avoid getting moisture in light sockets.
Disinfect Switches
The light switches tend to get grimy from daily use. Disinfect them by dampening a cloth with a bit of isopropyl alcohol and wiping clean.
Maximize Light Brightness
Cleaning off that dulling dust and grime allows your lighting to really beam at full brightness. Enjoy having an optimally lit mirror area!
Step 4: Restore That Showroom Shine
Revive Your MDF Vanity
If your vanity is made from MDF (medium-density fiberboard), you’ll want to use cleaners specifically formulated for this material. Avoid harsh chemicals or abrasives that can damage the surface.Take a look at the previous issue: The Pros and Cons of Different Dresser Materials.
The Right MDF Cleaners
Look for gentle, pH-neutral cleaners made for laminate or MDF surfaces. A solution of mild dish soap and water can also work well. Avoid anything containing ammonia or bleach.
Wipe Down Carefully
After cleaning with the approved solution, wipe down the MDF surfaces with a damp microfiber cloth, being careful not to over-saturate. Dry thoroughly with a clean cloth to prevent water stains or swelling.
Polish for a Smooth Finish
Once dry, you can use a dedicated MDF polish or cream to help renew the smooth, factory finish. Buff with a clean microfiber cloth for a low-luster sheen.
Brighten Up Metals
From the mirror frame to drawer pulls, vanities often feature metal fixtures that can appear dull and tarnished over time. This includes the vanity’s metal legs.
Step 5: Put it All Back Together
Prime Vanity Real Estate
Now that your vanity is sparkling clean, it’s time to put all your essentials back in an organized, functional way. First, determine what needs to be within arm’s reach on that prime vanity real estate.
The Everyday Essentials
These are the basics you absolutely need daily access to - your go-to makeup products, brushes, hairbrush and accessories, skincare routine items, etc. Situate these front and center.
Clever Organizing Tricks
To keep your vanity feeling open and clutter-free, look into some organizing accessories. Little trays, holders, and compartment dividers can give everything a designated spot.
Contain the Chaos
Clear acrylic or glass containers are a huge help for corralling all those small items like hair ties, clips, cotton rounds and more. Plus, they add some stylish visual appeal.
Low-Mess Habits
To maintain that sparkling clean vanity, make it a habit to do a 1-minute wipe down after each use. This prevents small messes from becoming big cleanups.
Deep Clean Routine
Finally, add a recurring vanity deep clean to your calendar every few months. Staying on top of it ensures your vanity always looks and functions its best.
Revel in Your Vanity’s Radiant Renewal
With just some simple tools and focused effort using these five steps, your vanity will emerge radiantly revitalized. First decluttering streamlined your daily essentials. The deep cleaning banished all grime while specialized techniques restored brilliant shine to mirrors, MDF, and metals. Reassembling thoughtfully with innovative storage will keep it pristine between deep cleans. Maintain this routine, and your lighted vanity desk will be a continual source of tranquility for self-care rituals. Enjoy that sparkling “like-new” radiance daily!


Leave a comment
This site is protected by hCaptcha and the hCaptcha Privacy Policy and Terms of Service apply.