Nailing your eye makeup can really make your eyes stand out in the best way. While it seems tricky, applying eyeshadow properly can totally transform your look. The trick is figuring out your specific eye shape and using techniques meant just for it. This guide will show you how to identify your eye shape, pick the right makeup tools and products, and follow step-by-step methods to make your eyes look bigger, brighter and more defined.

What's Your Eye Shape?
Figuring Out Your Eye Type
Before you can nail your eye makeup, you need to know your actual eye shape. It may seem obvious, but a lot of people get this wrong. Take a good look in the mirror and see if your eyes fit one of these common shapes:
- Almond - A subtle curved shape with upturned outer corners
- Round - An overall circular shape with barely any crease visible
- Hooded - Extra skin folding over and covering part of the lid area
- Monolid - A crease is barely there or completely flat across the lid
There are also upturned, downturned, deep-set, and wide-set eye shapes. Don't stress if you're unsure - this guide will help you identify your type.
Why Your Eye Shape Matters
Your specific eye shape plays a huge part in how eye makeup looks on you. Applying eyeshadow without considering your eye type can make eyes look smaller, emphasize flaws, or just look off. But using application methods designed for your eye shape will enhance your natural beauty. Almond eyes may need different shading than round or hooded eyes. The trick is learning what flatters your unique eye type best. With the right eyeshadow application, you can really make your best features stand out.
Once you know your eye shape, you'll be ready to apply eyeshadow like a pro using techniques made just for you. But first, you'll need the proper makeup tools.

What Tools Do You Need for Eye Makeup?
Your Brush Essentials
Having the right brushes makes applying eyeshadow so much easier. Here are the must-have brushes:
- Blending Brush - A soft, fluffy brush to seamlessly blend out harsh lines
- Crease Brush - A smaller, more precise brush to pack and blend color into the crease
- Flat Shader Brush - A dense, flat brush to evenly sweep eyeshadow across the lid
- Pencil Brush - A thin, pointed brush perfect for detail work like lining the eyes
You'll also want an angled brush for the brows and a spoolie to brush them out.
Picking Your Perfect Palette
Not all eyeshadow palettes work for everyone. When choosing shades, consider your eye color and skin's undertones:
- Blue or Green Eyes - Go for palettes with warm browns, oranges, and pinks
- Brown Eyes - Try a mix of warm and cool tones like purples, grays, and plums
- Hazel Eyes - Lean towards natural shades like greens, golds, and browns
For warm skin tones, choose golden, peachy or terracotta shades. For cool tones, pick palettes with soft pinks, grays and taupes.
Why You Need a Primer
Using an eyeshadow primer is a total game-changer for long-lasting wear. Primer creates a smooth base for eyeshadow to grip onto and prevents it from creasing or fading. Look for colorless, crease-resistant formulas.
With the right brushes, a palette perfect for your tones, and a trusty primer, you're all set to apply eyeshadow flawlessly for your specific eye shape.
Eyeshadow Application for Different Eye Shapes
Almond Eyes
Almond-shaped eyes are the most versatile and can pull off most makeup styles beautifully. Here's how to enhance their natural curves:
- Highlighting Natural Contours: Use lighter shades on the inner corner and center of the lid. Then apply a deeper tone in the outer corner and through the crease to accentuate the almond shape.
- Balanced Smokey Eyes: For dramatic or smokey looks, distribute the darker shadow evenly. Use deep shades on both inner and outer corners to keep the eyes looking symmetrical.
Round Eyes
Round eyes can look bigger and more wide-awake with strategic eyeshadow placement. Try these tricks:
- Creating Depth: Apply a matte shade slightly darker than your skin tone through the crease and outer corners. This adds definition and perceivable depth.
- Elongating with Color: After your transition shade, concentrate a deeper tone on just the outer corner of the lid. Blend it inwards keeping the inner lid lighter to elongate the eye.
Hooded Eyes
Don't let hooded or semi-hooded lids discourage you! These tips will help open up your eye area:
- Revealing the Lid: Use a matte shade in the outer and inner corners, blending upwards towards the brow bone. This visually "pushes back" the hooded area to reveal more lid space.
- Mattes Are Your Friends: Shimmery eyeshadows can look heavy on hooded lids. Stick to matte formulas, adding just a touch of sheen on the center lid if desired.
For more comprehensive hooded eye makeup tips, check out the blog "How Do You Apply Makeup to Heavily Hooded Eyes?"
Advanced Tips and Tricks for Your Eye Makeup
Blending Like a Pro
Blending multiple shades seamlessly is the key to an elevated, polished eye look.
Always begin with your lightest transition shade focused in the crease, blending it outwards. Then layer darker shades closest to the lash line, blending upwards.
Softly sweep a fluffy blending brush across your lid in windshield wiper strokes to diffuse harsh lines between shades. Blending in tiny circles also helps marry the colors together.
Faking Bigger, Brighter Eyes
Strategically placing lighter shades creates the illusion of bigger, more wide-awake looking eyes.
Apply a shimmery, light-catching shade in the inner corners and blend just along the inner third of your lid. This simple trick opens up and brightens the entire eye area.
Sweep a soft, pale neutral across the majority of your mobile lid space. Use deeper shades just in the outer corner and crease.
Adding Depth and Dimension
Don't be afraid of matte shades - deeper tones add gorgeous definition when applied right.
Use a rich matte brown or taupe color through your crease to really carve it out and create depth in the eye area.
Intensify your outer corners by building up different dark matte shades and textures. Blending them into the lower lash line gives a sultry, smokey effect.
Mastering Liner and Mascara
Your perfect eyeshadow deserves to be paired with defining liner and volumizing mascara.
Tight-line your upper waterline with a pencil or gel liner to make lashes look thicker and eyes more wide open.
No eye makeup is complete without a few coats of volumizing, lengthening mascara on curled lashes. It's the final pop!
Why You Need a Lighted Vanity
Good Lighting is Crucial
Lighting makes a huge difference when doing eye makeup. Applying in dim, yellow-toned lights? You simply can't see colors accurately or catch uneven blending. This leads to patchy, harsh makeup.
LED Lights Are Best
Standard bulbs distort colors and shadows, making flawless application nearly impossible. LED lights provide consistently clear, true-to-color illumination so you can see every detail as you work.
Get an LED Vanity Setup
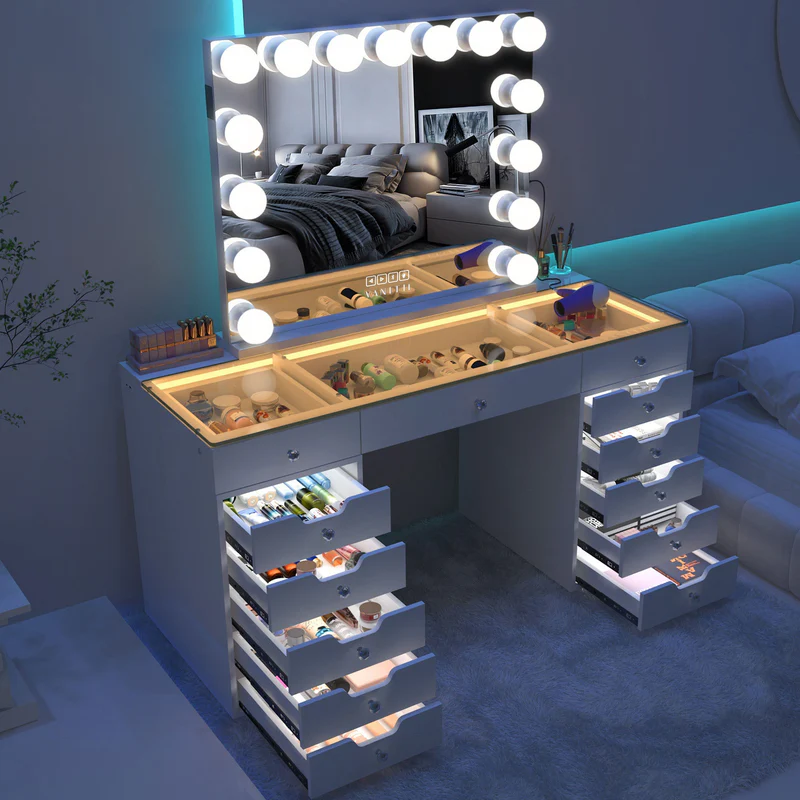
Invest in a vanity desk with LED lights around the mirror. This ensures even, adjustable brightness from all angles. Look for a large mirror, plenty of workspace, and drawers to store products neatly.
The Flawless Results
With a proper LED-lit vanity setup tailored to your needs, doing eye makeup becomes so much easier. You'll clearly see intricate blending and catch any harsh lines or unevenness. Your eye makeup will look professionally applied every time!
Mastering Your Most Mesmerizing Eye Makeup
With the right tools, customized techniques for your eye shape, and a lighted LED vanity, you're armed to create captivating eye makeup looks. Avoid pitfalls like over-applying shadow or cookie-cutter methods. Instead, build color gradually, highlight those bright spots, and tailor your approach to your unique eyes. Under clear LED lighting, you'll nail seamless blending and precise application every time. Radiant, professionally-done eye makeup that flatters your best features. Grab those brushes, find your perfect palette, and get ready to master flattering eye looks made just for you!


Leave a comment
This site is protected by hCaptcha and the hCaptcha Privacy Policy and Terms of Service apply.